
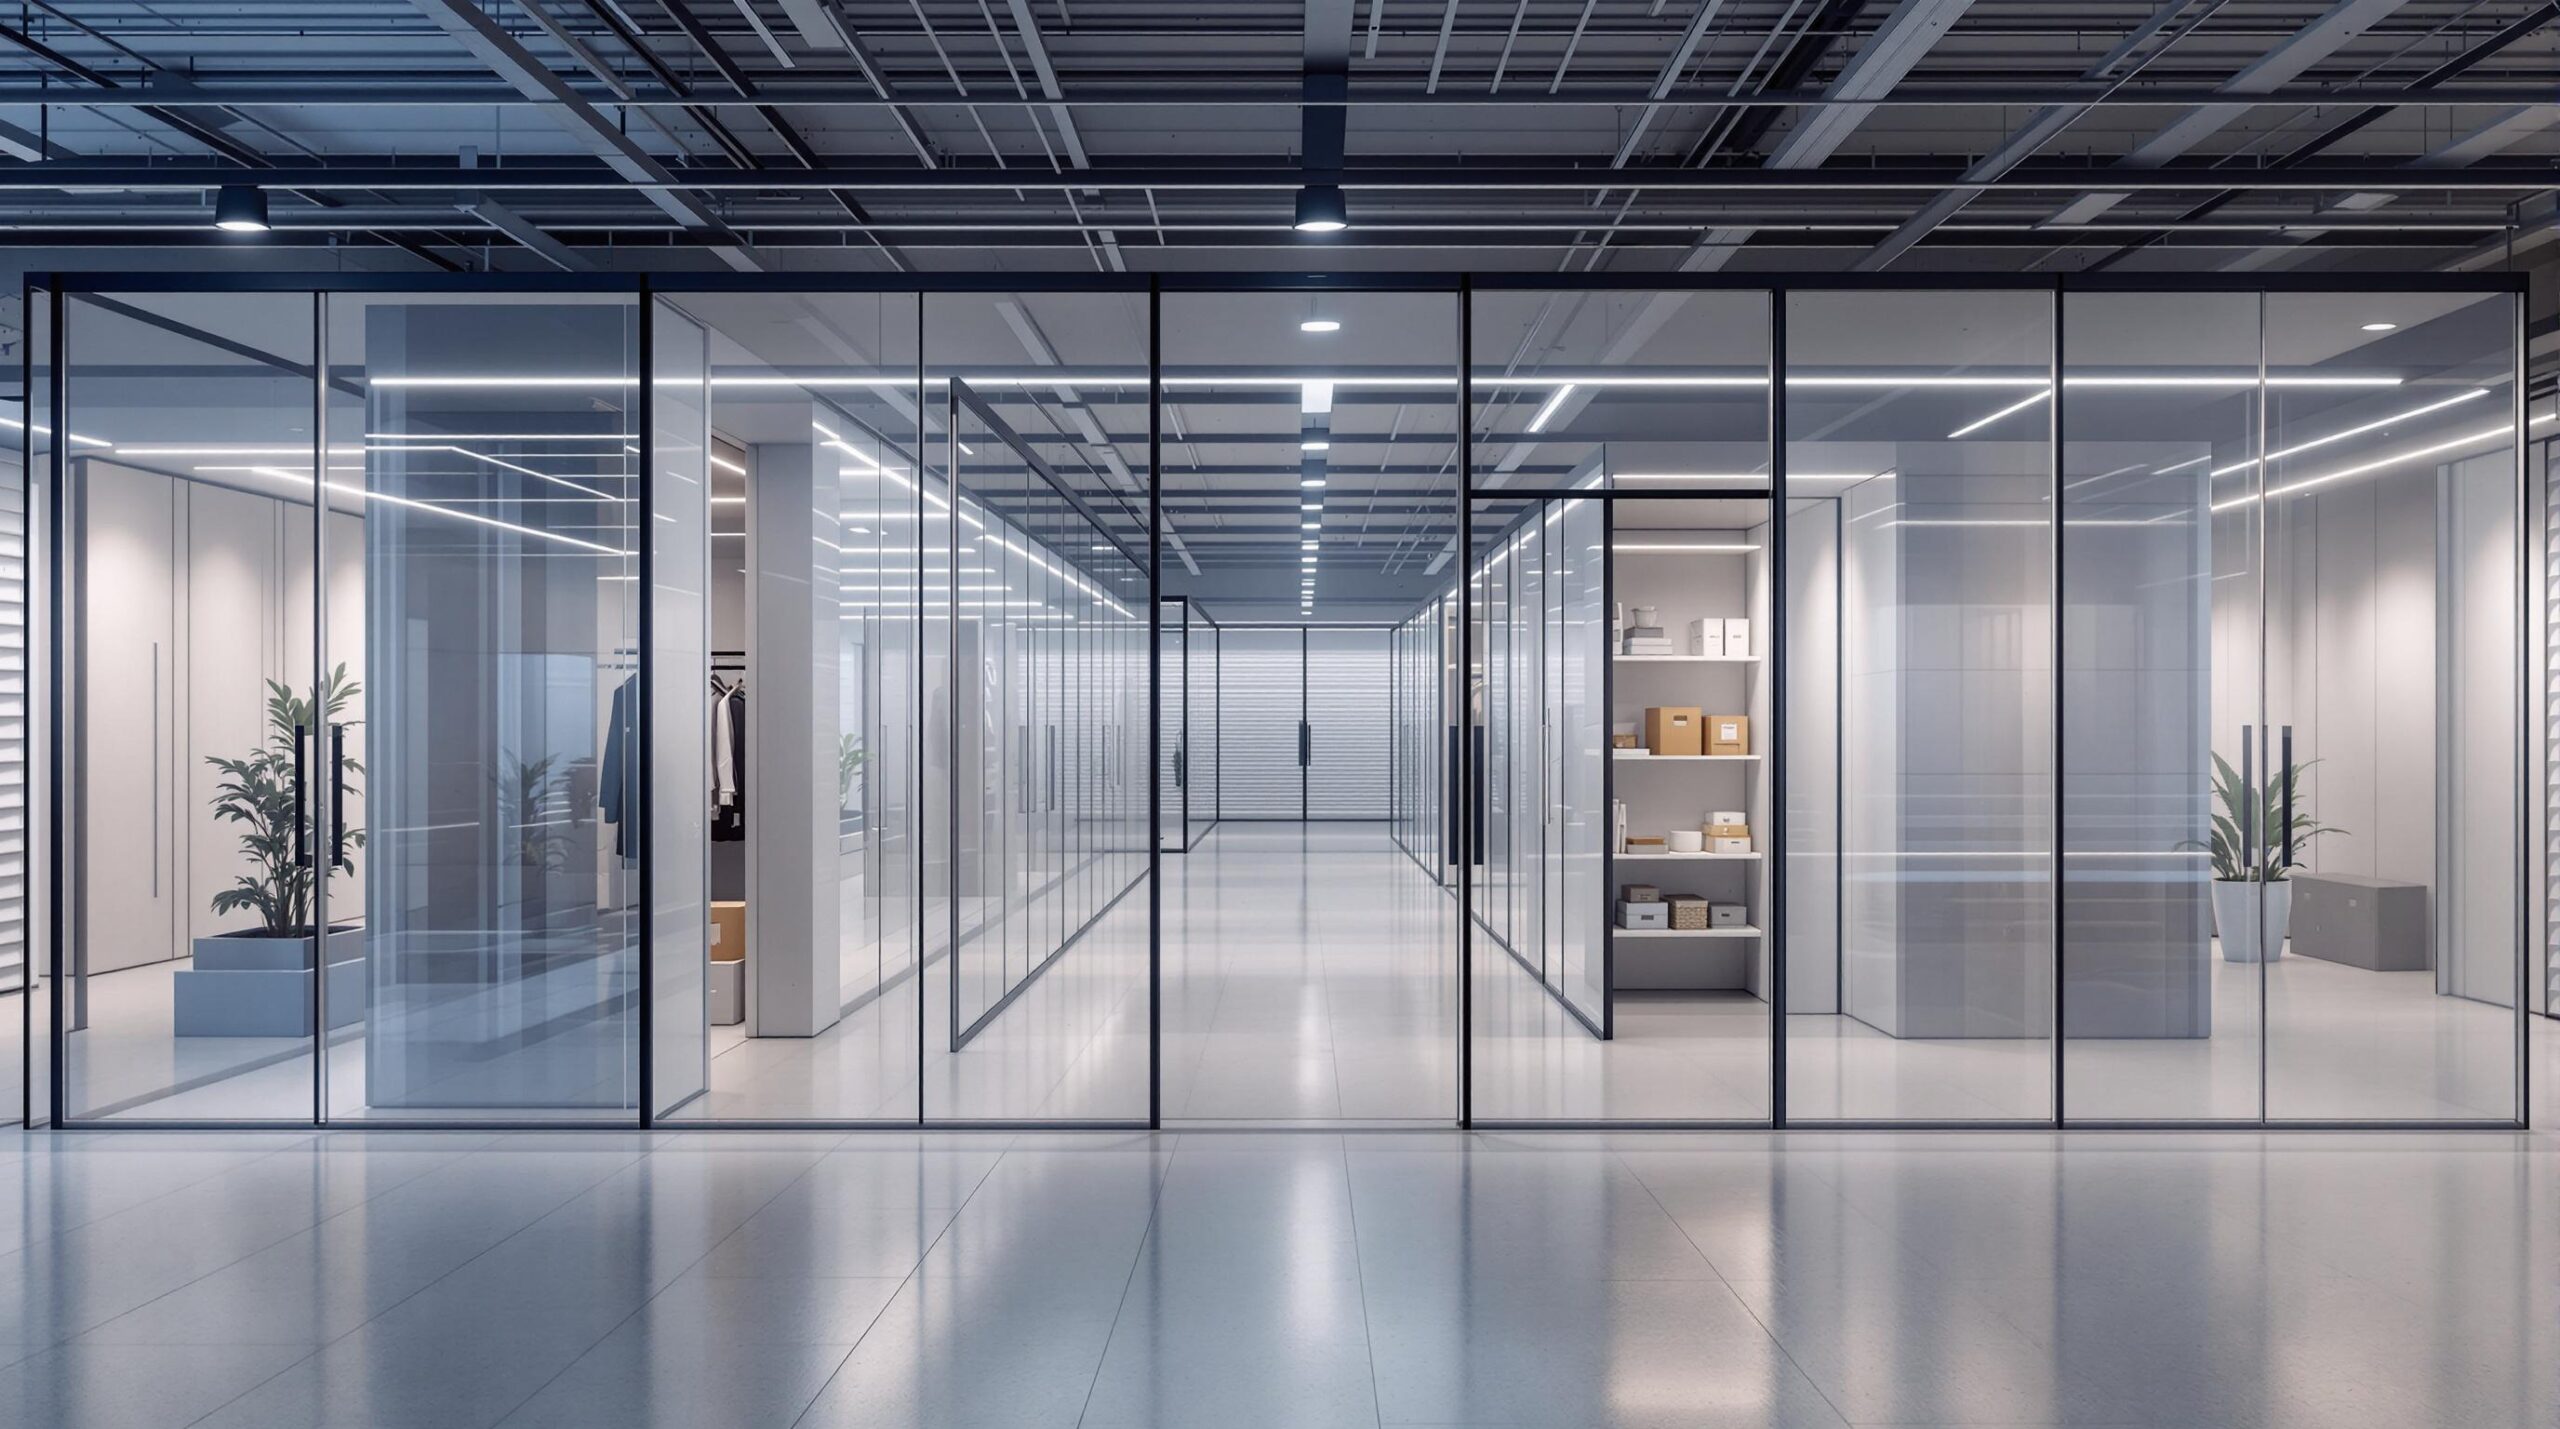
Maximising Space with Partitioning Systems: A Practical Guide
Want to make the most out of your self-storage space? Here's how partitioning systems can help you maximise storage capacity, improve security, and reduce maintenance costs - all while creating a polished, professional look.
Key Takeaways:
- Efficient Use of Space: Adjustable panels and mezzanine structures help you utilise vertical space effectively.
- Durable Materials: High-tensile, corrosion-resistant steel ensures long-lasting performance.
- Enhanced Security: Multi-point locks and protective features like corner guards boost safety.
- Professional Appearance: High-gloss finishes and customisable designs create a clean, branded look.
- Lower Maintenance Costs: Corrosion-resistant materials and protective features reduce wear and tear.
Whether you’re building a new facility or upgrading an existing one, smart design, durable materials, and proper installation can transform your storage space into a secure and efficient facility. Ready to optimise your storage? Let’s dive in!
Basics of Self-Storage Partitioning
Core Components
Effective self-storage facilities rely on durable materials and smart design. The walls of each unit are typically constructed using corrosion-resistant, high-tensile steel panels. Most facilities use 500mm wide, high-gloss panels for corridors, combining strength with a polished look.
Here are the main components:
| Component | Function | Key Features |
|---|---|---|
| Wall Panels | Separate storage units | High-gloss finish, corrosion-resistant |
| Security Doors | Control access | Multi-point locks, customisable colors |
| Mezzanine Structures | Maximise vertical space | Multi-level storage capabilities |
| Protection Features | Extend system lifespan | Corner guards, kick plates |
These components not only divide storage spaces but also improve functionality, security, and overall usability.
Space and Security Benefits
Partitioning systems are designed to optimise space and enhance security. Adjustable panel heights allow you to make full use of vertical space, maximising storage capacity from floor to ceiling.
Some key advantages of a well-planned partitioning system include:
- Efficient Space Use and Security: Adjustable panels make the most of vertical space, while strong steel construction provides excellent protection.
- Lower Maintenance Costs: Corrosion-resistant materials reduce upkeep over time.
- Professional Look: High-gloss finishes create a clean, polished appearance.
Protective features, such as corner guards and kick plates, further increase durability and minimise wear and tear. For more tips on optimising space and ensuring security in your self-storage facility, check out our installation guidelines.
Divider Walls 5 minute Installation - For Containers Storage UK
Space Planning and Design
Effective space planning begins with identifying your facility's specific needs and opportunities. A well-thought-out partitioning system can transform unused areas into a profitable storage facility by optimising layout and making the most of available height. These planning steps work hand-in-hand with the durable partition systems discussed earlier, ensuring every square foot is put to good use.
Site Analysis
A detailed site analysis helps optimise your space while maintaining accessibility. Key considerations include corridor widths, unit sizes, door clearances, and floor load capacity for multi-level designs. For more information on evaluating your facility, check out our design services page. Once you have a clear understanding of your site's layout, the focus shifts to making the most of vertical space.
Height Utilisation
Making full use of vertical space can dramatically increase rentable square footage. For instance, Kangaroo Self Storage's three-floor design and Ready Steady Store's custom two-floor system showcase how vertical planning can expand capacity and profitability.
"Our team collaborates from consultation through design to deliver bespoke height solutions that enhance both performance and appearance."
When planning vertical layouts, consider factors like building height limits, structural support needs, access to upper levels, fire safety standards, and proper lighting and ventilation.
Multi-level configurations can provide impressive returns by utilising space more effectively. A great example is Datastor in Newcastle, where ground and first-floor storage solutions were implemented to maximise efficiency while ensuring customer convenience.
sbb-itb-55d1b84
Materials and Equipment Selection
Choosing the right materials and features for your storage facility is crucial for ensuring durability, security, and ease of use. Modern partitioning systems blend sturdy materials with practical designs to create storage spaces built to last.
Partition Materials
High-tensile steel is a key material in professional partitioning systems. These panels resist corrosion and offer long-lasting performance while maintaining a polished look. A high-gloss finish adds extra protection against everyday wear.
There are two main design styles to consider:
- High-gloss flat panels for a sleek and modern look
- Corrugated panels for added structural strength
Protection Features
Beyond durable materials, additional protective features can help extend the life of your storage system. These features are designed to minimise damage and reduce upkeep. Some common options include:
- Corner protections to guard against damage in high-traffic areas
- Kick plates to shield lower panels from impacts
Together, these elements reduce maintenance and keep your facility in top condition. For instance, Ready Steady Store in Stoke implemented a two-floor system that highlights the effectiveness of these protective features.
Customer Amenities
Incorporating functional and tailored design elements during the initial setup can save costs down the line. A great example is Datastor in Newcastle, where a full-build installation for both ground and first floors showcased the benefits of early planning.
Selecting the right materials and equipment is the backbone of a successful storage facility. When paired with protective features and well-thought-out designs, these choices create a secure, durable, and user-friendly space. Next, we’ll dive into the installation process to bring these elements together effectively.
Installation Guidelines
Installing a partitioning system requires careful planning and attention to detail to ensure stability and efficient use of space.
Measurement and Setup
Accurate measurements are the foundation of a successful installation. Start with a thorough site survey to gather exact dimensions and identify any challenges. Customise high-tensile steel panels to meet your facility's height requirements. Pay close attention to factors like floor-to-ceiling clearance, door frame dimensions, unit sizes, layout, and access points. Use precision tools to confirm proper alignment and avoid misfitting components.
Once measurements are finalised, focus on ensuring the system's structure is sturdy and reliable.
Structural Support
Reinforce the structure for long-term durability. Use high-tensile steel and corrosion-resistant materials to enhance strength and minimise wear. Add protective features like corner guards and kick plates to reduce damage over time. For more detailed design and installation tips, check out our complete design services. These steps not only extend the life of your system but also improve its functionality, making it a key part of a well-operating self-storage facility.
Conclusion
Using an effective partitioning system is key to getting the most out of your self-storage facility. Facilities across Europe have shown how professional partitioning can improve storage operations and make better use of available space.
Careful planning and choosing the right materials are essential for success. Our 500mm high-tensile, high-gloss panels offer both strength and a polished look. Plus, with adjustable height options, you can create secure and efficient spaces that align with your facility's branding. This method ensures every design choice contributes to better performance.
To make the most of your project, work with experienced professionals who understand your facility's unique needs. Reach out to our complete design services team to explore how we can help turn your storage space into a well-organised, high-performing facility.


5 Benefits of Locker Storage Units for Your Business
Locker storage units can help your business save space, cut costs, improve security, and create a safer workplace. They’re flexible, scalable, and designed to fit various business needs, from small retail shops to large warehouses. Here’s a quick breakdown of the key benefits:
- Maximise Space: Use vertical storage and modular layouts to optimise your space.
- Save Money: One-time investment reduces long-term storage costs.
- Improve Security: Advanced features like tamper-resistant locks, keycard access, and CCTV keep items safe.
- Easy to Expand: Add or reconfigure units as your business grows.
- Enhance Workplace Safety: Organised storage reduces hazards and keeps workspaces clear.
Locker storage systems are a smart solution for businesses aiming to stay efficient, secure, and organised. Ready to upgrade your storage? Let’s dive into the details.
Benefits of Using Self Storage for Your Small Business
1. Better Space Usage
Efficient use of space is a priority for any business, and locker storage units are a smart way to maximise vertical storage while keeping floor space clear. These systems turn unused wall areas into functional storage, increasing capacity without requiring additional square footage.
Modern storage lockers come with designs that can be tailored to fit your specific needs. Got narrow hallways, tricky corners, or high ceilings? No problem. PSL highlights this advantage:
"One of the key benefits of our self storage locker systems is their versatile and space-efficient design."
Here’s why these modular systems work so well:
- Vertical Storage: Units can be stacked from floor to ceiling, making use of previously unused space.
- Flexible Layouts: Systems can be arranged in different ways to fit your available area.
- Size Options: Mix and match unit sizes to handle a variety of storage requirements.
These features make it easier to plan layouts that work for your space. Want expert advice? Check out our design services for more help.
When setting up your locker system, keep these points in mind:
- Traffic Flow: Ensure users can move easily while keeping the layout efficient.
- Accessibility: Place frequently used lockers in the most convenient spots.
- Security: Position surveillance equipment to maintain safety without sacrificing space.
2. Lower Storage Expenses
Keeping storage costs under control is crucial for any business. Investing in a reliable locker storage system can help cut down expenses over time by reducing maintenance needs. Our sturdy locker units are built to last, requiring very little upkeep, and come with PSL's dedicated support.
Unlike traditional storage options that involve ongoing rental and logistics fees, our locker systems are a one-time investment designed to keep future costs low. Check out our finance options and explore the full range of locker storage units to find the right fit for your business.
sbb-itb-55d1b84
3. Strong Security Features
Modern locker storage units are designed with advanced security measures to keep stored items safe. Our locker storage units combine digital and physical protections to create a secure environment for your belongings.
- Access control systems: Keycard and biometric authentication ensure only authorised individuals can access the lockers, while creating a digital record of all entries.
- Integrated CCTV: Constant monitoring helps detect unusual activity, keeping a watchful eye on your assets at all times.
- Tamper-resistant locks and durable construction: Built to resist forced entry, these features provide an additional layer of protection.
These features work together to protect your items and give you confidence in their safety. For more details, check out our security solutions.
4. Easy to Expand
These systems are built with security and efficiency in mind, but they also make growing your storage capacity straightforward.
Modern locker storage units are designed to grow with your business. Our locker storage units offer flexible configurations to make the most of your available space.
One client shared their experience:
"PSL's efficient installation made their storage expansion seamless and minimally disruptive."
Here's what makes the expansion process simple:
- Modular Layouts: Add, reconfigure, or modify units as your needs evolve.
- Expert Installation: Our team takes care of everything, from planning to setup.
- Business Continuity: New units are installed with minimal disruption to daily operations.
For a tailored plan, work with our design consultation team. They’ll help you address key factors like customer flow, accessibility, and security, ensuring your storage solution supports both current demands and future growth.
5. Better Workplace Safety
Organised storage isn’t just about space and security - it plays a key role in creating a safer workplace. Our locker storage units help reduce hazards and establish clear storage practices.
Fewer Trip Hazards
Keeping walkways and work areas clear lowers the chances of trips and falls, helping to prevent workplace accidents.
Streamlined Access
Our storage solutions are designed for ease of use, featuring:
- Clear labeling and designated spaces for items
- Convenient, easy-to-reach compartments
- Wide aisles for smooth navigation
Additionally, through our workplace safety consultation, we help businesses implement storage systems that improve safety and efficiency. Here's how well-organised storage contributes to a safer environment:
| Safety Aspect | Benefit |
|---|---|
| Clear Pathways | Reduces clutter and ensures safe access |
| Better Accessibility | Avoids awkward lifting and overreaching |
| Emergency Readiness | Makes safety tools easy to locate |
| Improved Traffic Flow | Prevents congestion in busy areas |
Proper labeling ensures items are easy to find while facilitating quick responses during emergencies.
Improved Security
Strong locks keep hazardous materials secure. Our security systems prevent unauthorised access, offering added safety and peace of mind.
Organised Workspaces
A well-structured storage system keeps everything in its place, reducing the risk of unsafe temporary storage. This applies to items like:
- Personal protective gear
- Cleaning products
- Tools and equipment
- Critical documents
When employees know exactly where to store and retrieve items, the workplace becomes not only safer but also more efficient.
Conclusion
Locker storage units can reshape how businesses manage their operations by providing storage solutions designed for today’s workplace challenges. These systems help make better use of space, reduce costs, improve security, and create safer environments - making them a smart choice for businesses aiming to stay efficient and organised.
Here’s what professional storage systems bring to the table:
- Better Space Use: Convert underutilised areas into practical storage.
- Cost Savings: Cut down on the need for external storage facilities.
- Stronger Security: Keep valuable items and sensitive materials safe.
- Flexible Options: Adjust to the changing needs of your business.
- Improved Workplace Safety: Maintain an organised, hazard-free environment.
If upgrading your storage is on your agenda, partnering with experienced providers can make all the difference. Through our workplace safety consultation, we help businesses implement storage systems that align with their unique requirements.
As Mini Lager shared:
"PSL completed my Self Storage conversion. I am very happy with my finished facility. PSL were professional and efficient and it was a pleasure to deal with them. I would recommend PSL as fit out contractors for European storage facilities as nothing was a problem on site and they were extremely helpful throughout the whole job."
Our security solutions ensure your storage system balances space efficiency with the security and accessibility your business demands. Ready to take the next step? Evaluate your storage needs, explore customisation possibilities, and connect with our experts to create a storage system tailored to your business. Reach out to our team today!
Related posts
- 7 Key Features of Modern Self-Storage Facility Design
- Why Outsourcing Storage Facility Management Makes Sense
- Design Smarter Facilities with Modular Storage Partition Systems

Self Storage Design – Innovative Layouts for Maximum Efficiency
Designing self-storage facilities is all about maximising space, improving usability, and incorporating modern features. Here’s a quick overview of the core ideas from the article:
- Maximising Space: Use mezzanine floors, multi-level systems, and partitioned units to increase rentable areas without expanding the building.
- Modern Features: Integrate digital security, automated climate control, and flexible unit configurations to meet customer needs.
- Smooth Operations: Plan access points, wide corridors, and clear wayfinding for better movement and usability.
- Energy Efficiency: Use LED lighting, smart ventilation, and insulation to reduce costs and improve sustainability.
- Safety and Security: Include fire protection systems, keyless access, and CCTV for a secure environment.
Quick Overview of Modern Trends
- Multi-Level Systems: Expand vertically for more capacity.
- Digital Security: Automate safety and tracking.
- Temperature Control: Protect sensitive items with zoned climate systems.
- Flexible Units: Adapt to diverse customer needs.
These principles, when applied effectively, can boost profitability and improve customer satisfaction. PSL specialises in designing and managing projects that bring these ideas to life, ensuring compliance and efficiency every step of the way.
How to Design a Mezzanine for Self-Storage Facility
Core Design Principles
Effective self storage design focuses on maximising space and ensuring smooth operations. These principles are crafted to meet the needs of both facility operators and customers.
Space Utilisation Techniques
PSL uses smart partitioning methods, like mezzanine flooring, to make the most of vertical space. Their approach blends various design elements to increase storage capacity efficiently.
| Design Element | Space Benefit |
|---|---|
| Mezzanine Flooring | Doubles vertical space |
| Partitioning Units | Allows flexible unit configurations |
| External Garage Units | Makes use of peripheral areas |
| Locker Systems | Ideal for smaller spaces |
Access and Movement Planning
Beyond optimising space, ensuring smooth movement within the facility is key to efficient operations. PSL's end-to-end project management emphasizes strategic placement of access points and pathways to enhance usability while maximising rentable areas. Key considerations include:
- Primary access points designed for efficient flow.
- Wide corridors to accommodate loading equipment easily.
- Roller staircases placed for convenience.
- Clear wayfinding systems to assist customer navigation.
Safety and Security Features
PSL integrates safety and security without sacrificing space efficiency. Their designs comply with all building regulations and incorporate advanced fire protection systems. Facilities are also equipped with well-placed security access points to ensure a safe environment for customers and their belongings.
| Safety Feature | Implementation |
|---|---|
| Fire Protection | Systems designed to meet regulations |
| Security Access | Strategically placed control points |
| Building Compliance | Full adherence during design phase |
Modern Layout Solutions
Modern storage layouts combine well-established design strategies with cutting-edge technology to maximise space, efficiency, and user satisfaction. For instance, the self storage design approach leverages advanced layouts and tech to deliver better performance, security, and convenience.
Multi-Level Storage Systems
Multi-level storage facilities have changed how space is used, especially in urban areas where land is scarce. By building upwards, these designs significantly increase storage capacity. Here's how:
| Facility Example | Layout Features | Benefit |
|---|---|---|
| Datastor (Newcastle) | Ground and first-floor design | Expanded storage capacity |
| Red Rose Self Storage | 2-floor layout with mezzanine | Better use of limited space |
This vertical approach works hand-in-hand with digital innovations, improving both security and automation.
Digital Security and Automation
Modern storage facilities now rely on advanced digital security and management systems to boost safety and streamline operations. Key features include:
- Smart Access Control: Keyless entry with individual unit tracking
- Automated Climate Monitoring: Constant checks on environmental conditions
- Digital CCTV Coverage: Real-time alerts and automated incident detection
- Automated Inventory Management: Tracks unit occupancy digitally
These technologies not only improve security but also reduce staffing needs. PSL's comprehensive project management ensures these systems are seamlessly integrated during the design and construction phases. Visit our site to explore more about turn-key project management.
Temperature Control Systems
Maintaining the right conditions is crucial for certain types of storage. Modern temperature control systems focus on energy efficiency while protecting sensitive items. Key features include:
- Zoned Climate Control: Custom temperature zones for specific storage needs
- Smart Ventilation: Automated air circulation based on occupancy and weather
- Humidity Management: Systems to regulate moisture levels
- Energy-Efficient Design: Optimised insulation and airflow for reduced energy use
These systems are ideal for safeguarding items like electronics, artwork, and important documents, ensuring proper conditions while keeping energy consumption low.
sbb-itb-55d1b84
Materials and Construction
Modern self-storage facilities rely heavily on smart material choices and effective construction techniques. These elements directly impact the efficiency, durability, and overall cost of the facility, while also focusing on energy savings and optimal use of space.
Partition Types and Installation
Partitions form the backbone of any self-storage facility. Experts in self-storage design stress the importance of choosing materials that align with the facility’s specific needs and budget. PSL offers partitioning systems that combine strength with easy installation.
| Partition Type | Key Features | Best Application |
|---|---|---|
| Steel Panel System | High security, fire-resistant | High-value storage units |
| Mesh Partitioning | Ventilation, visibility | Climate-controlled spaces |
| Solid Wall Units | Maximum privacy, soundproofing | Document storage areas |
These partitions are designed and installed with precision, ensuring both durability and adaptability for future changes.
Space-Saving Floor Systems
Mezzanine flooring is a game-changer for facilities looking to make the most of vertical space. It turns single-story setups into multi-level operations, significantly increasing usable space. PSL’s mezzanine solutions are a prime example of this transformation.
Key features of mezzanine systems include:
- Integrated Access Points: Includes staircases and lifts for seamless movement.
- Modular Design: Allows for future expansion without major disruptions.
- Enhanced Load Capacity: Built to handle heavy storage demands.
- Regulation Compliance: Fully meets UK building standards.
Energy-Efficient Design
Energy efficiency is a top priority in modern storage facility construction. Using the right materials and methods can lower operational costs while benefiting the environment. With turn-key project management, energy-efficient features are integrated from the start.
| Design Element | Energy-Saving Feature | Impact |
|---|---|---|
| Insulation Systems | Temperature regulation | Reduced HVAC costs |
| LED Lighting | Motion sensors | Lower electricity usage |
| Natural Light Integration | Skylights and windows | Decreased daytime power demand |
These features not only reduce energy consumption but also enhance the overall functionality and sustainability of the facility.
Design Examples and Results
Real-world examples help bring the principles of modern layout and efficient space use to life. PSL's portfolio highlights successful self-storage facility designs that show how thoughtful strategies can drive both functionality and profitability.
Success Factors in Storage Design
The key to a successful storage facility lies in smart design choices that balance space and usability. Here are a few noteworthy projects:
| Project | Key Features |
|---|---|
| Kangaroo Self Storage, Carlisle | 3-floor facility with turnkey services |
| Datastor, Newcastle | Ground and first-floor facility with turnkey services |
| Ready Steady Store, Stoke | External garage units paired with 2 floors of partitioning units |
These projects demonstrate how strategic planning can enhance both efficiency and revenue.
Self Storage Design Solutions
PSL specialises in tailored solutions that maximise returns through smart space planning. For example, Red Rose Self Storage showcases this approach with a carefully planned unit mix and well-placed access points. The result? Improved functionality and increased profits. This project is a clear example of how expert self storage design translates into real-world success.
With 24 years of experience, PSL ensures every project benefits from optimised layouts, effective space use, expert installation, and full regulatory compliance. These time-tested methods continue to redefine storage facility design, delivering measurable results for owners and operators.
For more details on how PSL approaches storage design, visit their page on self storage design.
Conclusion
Designing self-storage facilities effectively is all about making the most of available space and incorporating modern solutions to boost profitability. With over 24 years of experience, PSL has shown time and again how smart layouts can directly increase a facility's bottom line.
One satisfied client shared their experience:
"PSL were professional and efficient and it was a pleasure to deal with them. I would recommend PSL as fit out contractors for European storage facilities as nothing was a problem on site and they were extremely helpful throughout the whole job."
This feedback reflects the consistent quality and reliability of PSL's approach to self-storage design.
When it comes to modern self-storage facilities, success depends on balancing several key factors:
- Space Optimisation: Planning layouts to maximise rentable areas.
- Accessibility: Ensuring smooth traffic flow for customers and staff.
- Security: Incorporating strong, reliable protection measures.
- Future-Readiness: Designing with growth and adaptability in mind.
PSL takes these principles and combines them into a seamless process. Their turn-key project management ensures every project runs smoothly from initial concept to final delivery. Plus, their flexible financing options make it easier for facility owners to start generating income without large upfront costs.

Rolling Staircases – Smooth, Safe, and Versatile Access
Rolling staircases are mobile, cost-effective solutions for accessing different levels in facilities without requiring permanent structural changes. They maximise space, improve safety, and are highly adaptable for industries like storage, warehouses, and commercial spaces. Key features include:
- Space efficiency: Ideal for narrow layouts and evolving storage needs.
- Cost savings: Cheaper and faster to install than mezzanine floors.
- Safety: Non-slip treads, secure handrails, and locking mechanisms.
- Customisation: Adjustable heights, unique layouts, and tailored designs.
PSL offers both standard and custom models, ensuring compliance with UK building regulations while providing full project support, from design to installation. Regular maintenance ensures long-term reliability and safety.
Related video from YouTube
Rolling Staircase Models
PSL's rolling staircases are designed to combine practicality with smart design, providing space-saving solutions while meeting safety requirements. These models are tailored to meet the needs of different facilities, thanks to careful engineering and customisation options.
Basic Models
PSL's standard rolling staircases are the foundation of their product line. With sturdy construction, anti-slip treads, and secure locking mechanisms, these models are ideal for facilities with fixed height requirements, such as storage units.
Custom Design Options
PSL also offers custom rolling staircases to address specific spatial and operational challenges. These bespoke designs are crafted to fit unique building layouts, offering features like adjustable heights, specialised platform setups, and increased weight capacities. Each custom staircase is rigorously assessed to ensure it meets both safety and operational standards. These tailored solutions complement PSL's standard product range, providing flexibility for a wide variety of applications.
PSL's Rolling Staircase Range

PSL's rolling staircase collection showcases their dedication to providing adaptable access solutions. They manufacture both standard and custom models with a focus on consistent quality. Key features include:
- Customisable dimensions
- Easy installation
- Budget-friendly options
- Full project support
Beyond manufacturing, PSL handles complete project management, ensuring every staircase installation is perfectly suited to the facility while adhering to UK building regulations.
For more ways to improve your facility's layout, check out their mezzanine flooring options.
Safety Components
PSL's rolling staircases are designed with a focus on safety, ensuring dependable performance while meeting UK building regulations for secure commercial access.
Anti-Slip Features
The staircases are equipped with non-slip treads, providing a strong grip in all conditions. A wide, stable base and adjustable leveling features keep the structure steady, even on uneven surfaces.
Support Rails
Continuous support is provided by a well-designed rail system. Ergonomic handrails and high-visibility guardrails reduce the risk of accidents, especially in dimly lit areas. For additional protection, these staircases can be paired with PSL's fire protection systems.
Safety Locks
Each staircase includes a reliable safety locking system to prevent unintended movement. This system features wheel locks, braking mechanisms, and additional securing options for quick and secure use. PSL ensures these components meet UK workplace standards through regular testing and certification. Every installation is accompanied by a detailed safety demonstration and documentation package for added peace of mind.
sbb-itb-55d1b84
Usage Areas
Rolling staircases play a key role in various industries, helping make better use of vertical space.
Storage Facilities
Storage facilities gain a lot from these solutions. PSL has completed several projects across the UK, including:
- Kangaroo Self Storage in Carlisle: A three-floor facility
- Datastor in Newcastle: Access to ground and first floors
- Red Rose Self Storage: A two-floor configuration
The mobility of rolling staircases allows managers to adjust access points as storage layouts evolve. This flexibility is equally valuable in busy warehouse environments.
Warehouse Access
Rolling staircases offer several advantages for warehouses:
| Feature | Benefit |
|---|---|
| Quick Installation | Minimises downtime |
| Mobility | Easy to reposition |
| Space Efficiency | Doesn't require a permanent setup |
| Cost-Effectiveness | Reduces upfront costs |
These benefits make rolling staircases a practical solution for warehouses and beyond.
Commercial Applications
In commercial settings, rolling staircases are especially useful for retail and office spaces. A great example is Mini Lager in Norway, where PSL demonstrated their expertise in self-storage transformations. As their representative shared:
"PSL completed my Self Storage conversion in Rygge, Norway. I am very happy with my finished facility. PSL were professional and efficient and it was a pleasure to deal with them. I would recommend PSL as fit-out contractors for European storage facilities as nothing was a problem on site and they were extremely helpful throughout the whole job."
PSL's custom designs work well for unique layouts, making them perfect for businesses looking to optimise vertical space while ensuring safe access to higher areas.
Selection Guide
Selection Criteria
Choosing the right rolling staircase involves evaluating several important factors to ensure it meets your facility's needs for safety and performance. PSL specialises in creating custom solutions tailored to specific requirements.
Here’s what to consider:
| Criteria | Key Points |
|---|---|
| Height Requirements | Account for floor-to-floor distance, landing space, and overhead clearance. |
| Space Constraints | Assess available floor space, width limitations, and ease of mobility. |
| Access Frequency | Determine how often it will be used, the number of users, and weight capacity. |
| Building Layout | Consider storage needs, traffic flow, and access points. |
Focus on both efficient operation and compliance with relevant regulations.
UK Building Standards
Once you've identified your needs, ensure the staircase aligns with these key standards:
- Structural Integrity: It must handle the specified load safely.
- Safety Features: Includes non-slip treads and secure handrails.
- Dimensional Standards: Follow minimum tread depth and maximum riser height requirements.
- Mobility Requirements: Ensure mobility and locking mechanisms meet legal standards.
PSL guarantees that all installations comply with these regulations. From consultation to installation, they provide complete support.
Design Options
After confirming safety and functionality, consider customising the design to suit your facility:
- Structural Adjustments
PSL can modify each staircase to match unique building layouts. Their design team uses AutoCAD to create detailed visualisations of the proposed solution. - Material Choices
Select materials designed for durability and long-term use. - Additional Safety Features
Enhance safety with extra features based on your specific needs and compliance requirements.
PSL offers a variety of customisation options to meet diverse operational demands. Check out their full range of rolling staircases to explore configurations and find the perfect fit for your facility.
Setup and Care
PSL's design and construction ensure top-tier performance, but proper setup and regular care are essential to keep things running smoothly.
Installation Steps
PSL provides full support during every phase of installation to ensure safety and compliance with building standards.
- Site Assessment: The technical team evaluates the facility, taking precise measurements and identifying any potential challenges. Accurate specifications are key here.
- Design Confirmation: Using CAD drawings, PSL outlines mounting points, clearances, and safety features to finalise the design.
- Professional Installation: Certified installers handle the setup, ensuring everything meets operational and safety standards.
Maintenance Guide
Regular upkeep is critical to ensuring your rolling staircase stays in great condition. PSL offers routine service to keep everything running like clockwork.
- Daily: Check treads and handrails for any visible issues.
- Weekly: Inspect locking mechanisms and wheels for proper function.
- Monthly: Lubricate moving parts and test safety features.
- Quarterly: Have structural components inspected by a professional.
- Annually: Schedule a full safety audit and certification.
Sticking to this schedule ensures your staircase stays safe and reliable for years to come.
Long-term Value
Investing in quality rolling staircases pays off in the long run. Here’s why:
- Durable Materials: Built from corrosion-resistant steel for lasting strength.
- Reliable Components: High-quality wheels and bearings designed for heavy use.
- Safety Standards: Fully compliant with UK building regulations.
- Comprehensive Support: Maintenance contracts ensure efficient performance and quick service when needed.
Summary
Main Points
Rolling staircases offer efficient access solutions with three primary benefits:
Maximising Space
- Perfect for buildings with narrow layouts.
- Adds extra storage levels while making the most of existing floor space.
- Designed specifically for facilities dealing with space limitations.
Cost Efficiency
- Cuts down on the need for major structural changes.
- Reduces both installation time and labor expenses.
- Boosts storage capacity, offering a solid return on investment.
Safety and Compliance
- Built to align with UK building regulations, featuring advanced safety elements.
- Regular maintenance ensures ongoing reliability and safety.
- Includes non-slip treads and secure handrails for added protection.
These benefits are made possible through PSL's dedicated service and support.
PSL Services
PSL enhances these advantages with a thorough service approach:
Tailored Design
- Custom solutions to fit specific building needs.
- Provides detailed CAD drawings and on-site assessments.
- Offers expert guidance throughout the project.
Installation and Support
- Certified technicians handle professional installation.
- Comprehensive project management from start to finish.
- Maintenance contracts to ensure long-term performance.
Commitment to Quality
- Durable steel construction for heavy-duty use.
- High-quality components built to last.
- Regular safety checks and certifications.
PSL's dedication to quality and safety positions them as a top choice for rolling staircase solutions in the UK. Their focus on customisation and full-service support ensures each project meets client needs while adhering to strict safety standards. Learn more about their services on the PSL Services page.
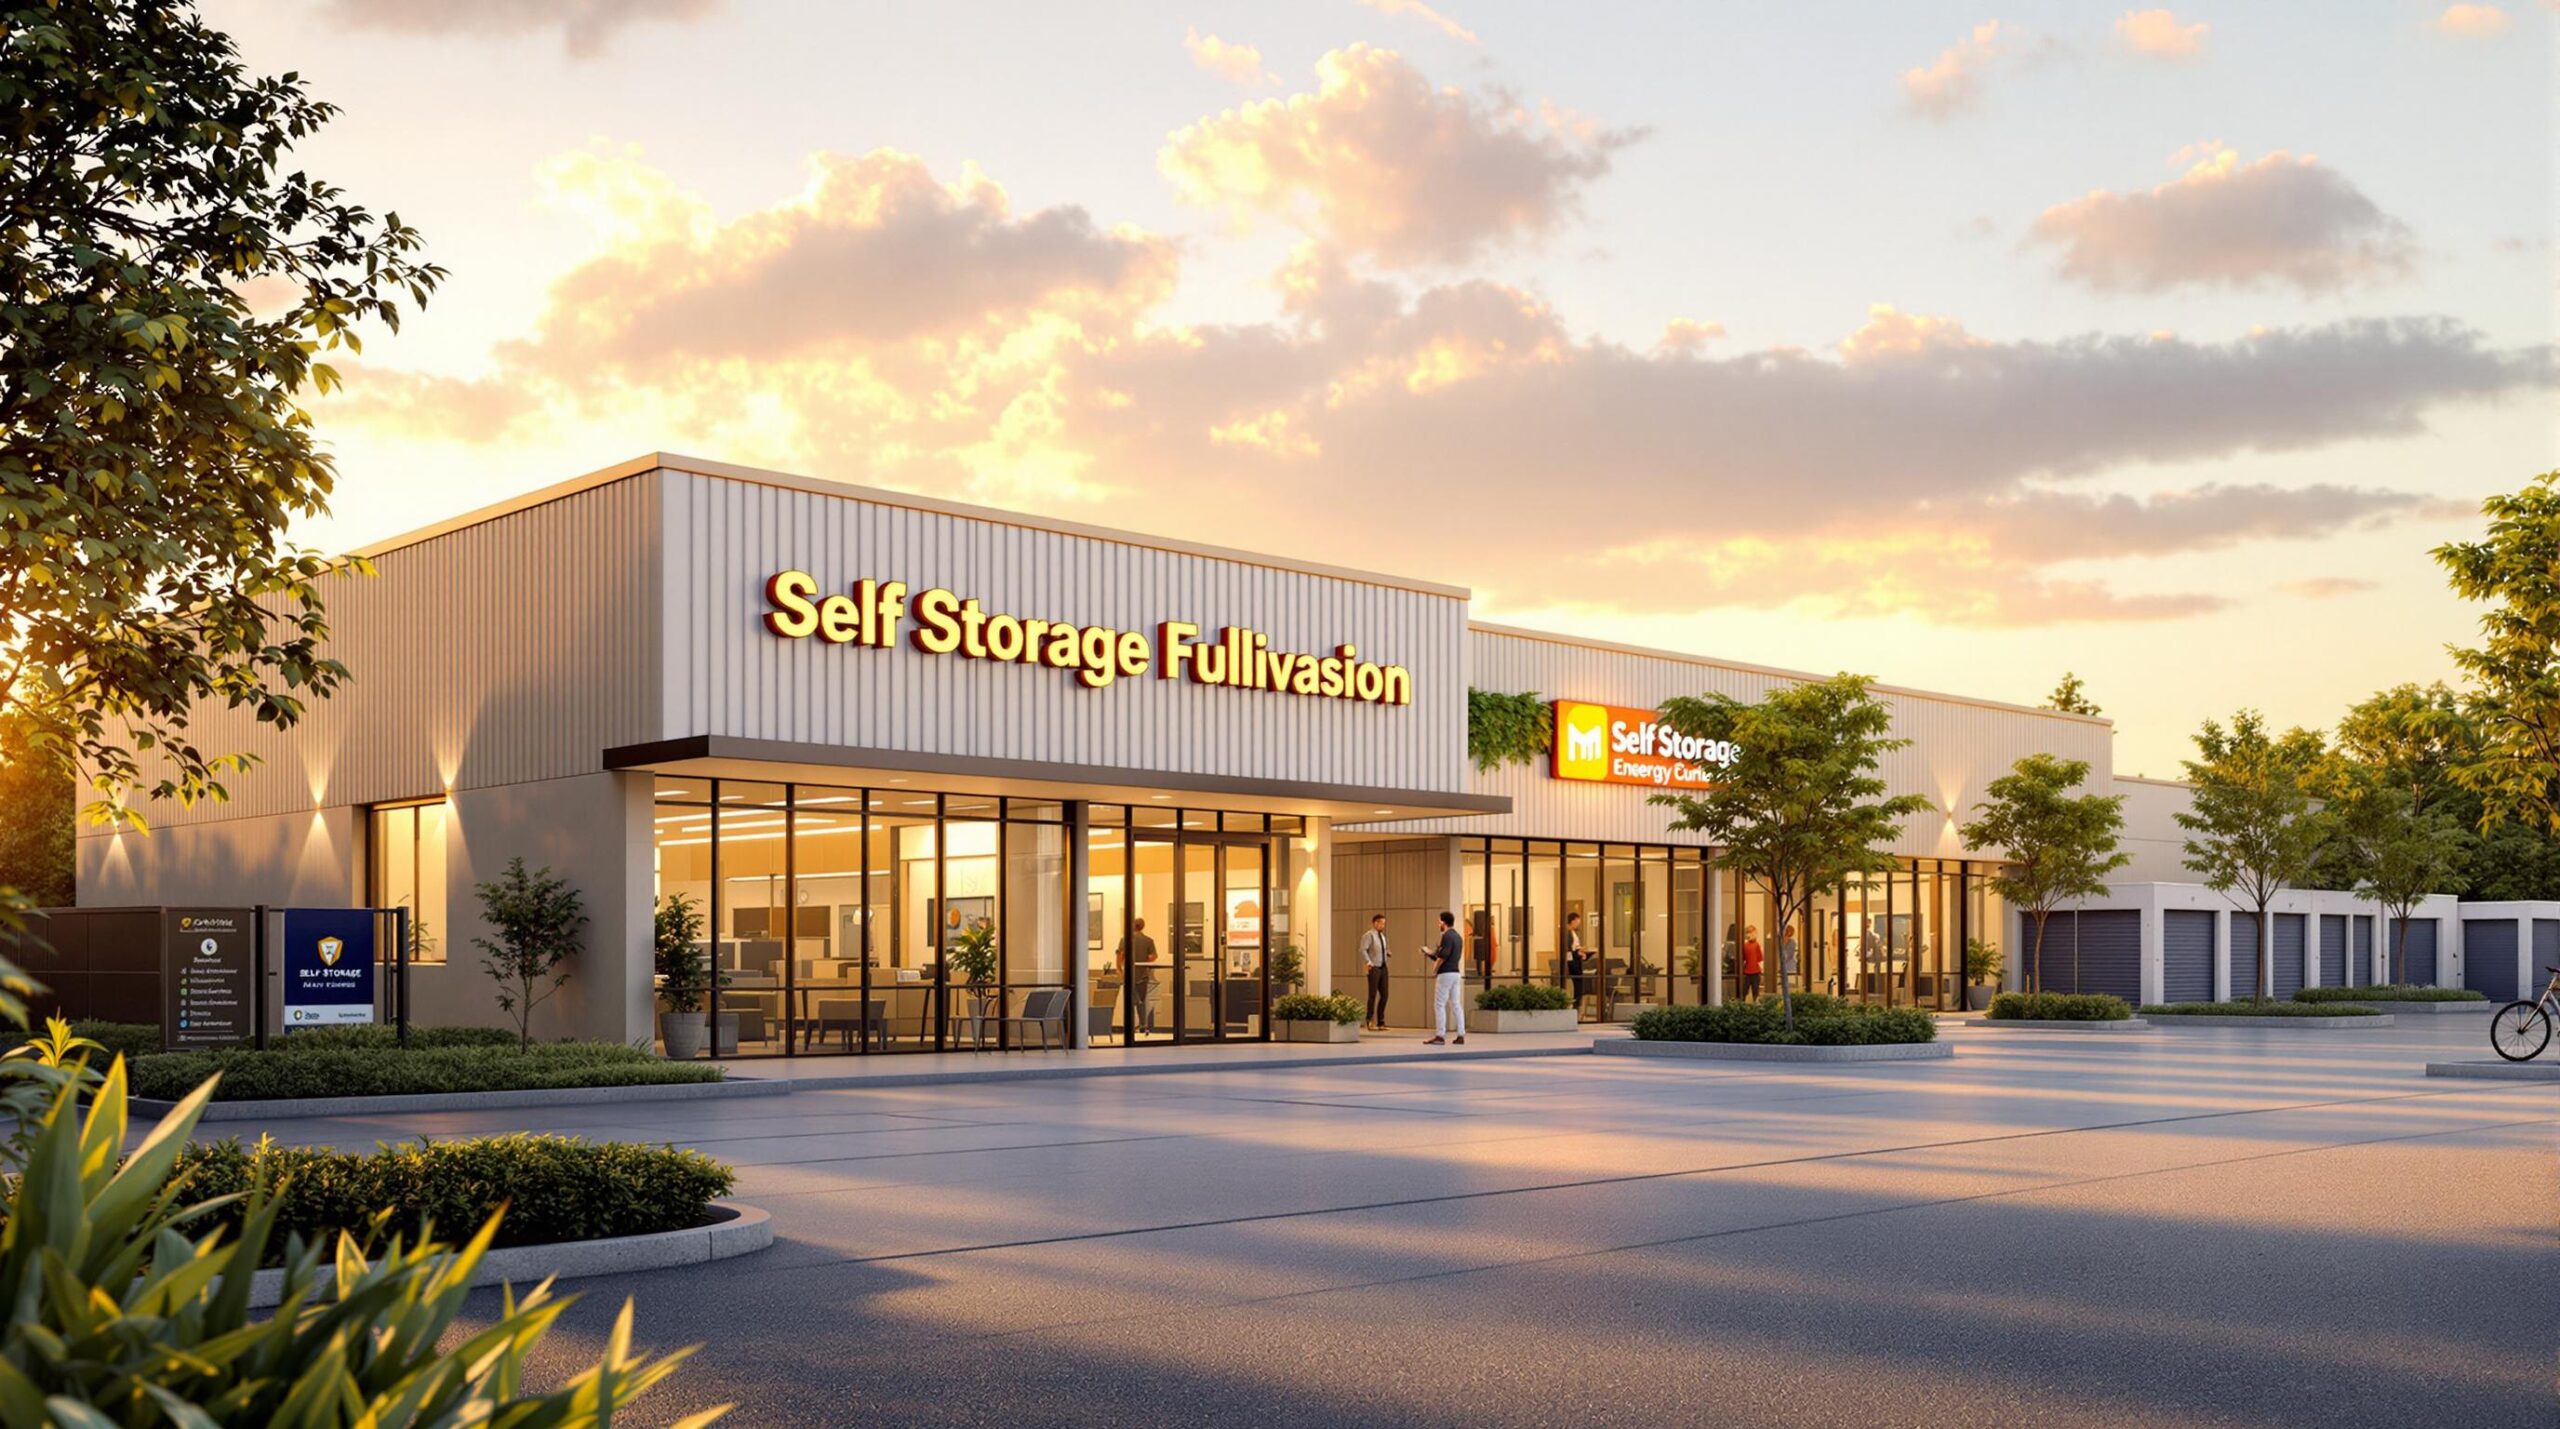
7 Key Features of Modern Self-Storage Facility Design
Self-storage designs are evolving to meet growing demands for efficiency, security, and sustainability. Here’s a quick breakdown of the 7 key features shaping the industry:
- Modular Construction: Cuts building time by 30-50% and reduces costs by 30-40%.
- Smart Security & Access: Biometric systems, IoT sensors, and mobile apps improve safety and convenience.
- Multi-Story Space Planning: Maximises urban real estate with 300% more storage capacity.
- Temperature & Humidity Control: Advanced systems maintain optimal conditions, cutting HVAC costs by 25-40%.
- Building Conversion: Repurposing old buildings saves 30-50% on construction costs.
- Energy-Efficient Design: Solar power, LED lighting, and smart energy systems reduce energy use by 25-70%.
- Mixed-Use Integration: Combines storage with retail or office spaces, boosting revenue by 15-20%.
These features help facilities lower costs, improve operations, and attract more customers. Keep reading for detailed insights into how these innovations are transforming the self-storage industry.
Constructing a New Self Storage Facility from the Ground Up
1. Modular Construction Methods
Modular construction is reshaping how urban developers tackle the challenges of speed and efficiency in building projects.
By combining site preparation with factory-based component production, this method cuts project timelines by 30-50%. Components are built to meet strict IBC standards, ensuring quality while saving time. This streamlined approach aligns with the growing demand for smarter, more efficient building solutions.
The benefits don’t stop there. Modular designs are weather-resistant, featuring insulated structures and durable roofing systems. Developers also see major cost savings: a 30-40% reduction in labor costs, less material waste, and financing costs slashed by 40% thanks to shorter project durations.
"The integration of modular construction methods has transformed our project delivery timeline. What previously took 12 months can now be completed in just 4-5 months, while maintaining superior quality control", says Wilmot Modular's operations director.
Flexibility is another key advantage. Systems like those from ROI Metal Buildings allow for customisable unit sizes within the same structure. Even after construction, units can be reconfigured to meet changing market needs, making them a practical choice for long-term projects.
Factory production also ensures consistent quality through:
- Stringent weather resistance testing
- Load-bearing capacity evaluations
- Third-party inspections during manufacturing
- Compliance with IBC standards and local fire codes
A great example of modular success is U-Haul's Carlsbad facility, completed in 2022. This three-story, 100,000-square-foot project took just 11 months to finish - 40% faster than traditional methods - while cutting costs by 15%. The facility, which includes 800 climate-controlled units, not only maintained high-quality standards but also reached tenants sooner, boosting occupancy rates by 25%.
2. Smart Security and Access Systems
Today's self-storage facilities are stepping up their game with advanced security technologies that go well beyond old-school locks and keys. By combining IoT devices with centralised management systems, these smart setups not only improve security but also help with tenant retention and managing energy costs.
A big part of this shift is AI-driven access control systems. These systems use tools like biometric authentication and mobile apps to make access both secure and convenient. For example, Vantiva's Peek™ camera system integrates motion detection and facial recognition. Facility managers can oversee multiple locations through a single cloud dashboard. The results? Facilities have seen 30% fewer security incidents and 15% higher tenant retention rates.
IoT sensors play a dual role, monitoring for security breaches and environmental changes. These sensors can detect unauthorised access and shifts in conditions, sending real-time alerts. Tenants can unlock units via mobile apps, grant temporary access, and even get instant updates about their stored items - a feature especially handy for urban locations where convenience matters most.
Climate-controlled units are also getting a boost. Automated HVAC systems not only cut energy costs by 20% but also increase customer satisfaction by 40%. Facilities typically see a return on investment within 18–24 months.
"The implementation of our Smart Storage platform has revolutionised how facilities operate. Managers can now respond to incidents proactively rather than reactively, while tenants enjoy unprecedented control over their units through their smartphones", says a Vantiva systems architect.
For facility operators, these systems streamline daily tasks. Routine jobs like occupancy checks and billing alerts are automated, cutting down on staffing needs while improving accuracy. Predictive maintenance features even flag issues like worn hinges using motion sensors. All of this ties back to the goal of maximising occupancy through efficient operations.
Data security is another key focus. Platforms now include strong encryption and privacy protections. Systems like Vantiva's meet GDPR and CCPA compliance standards, ensuring sensitive information remains secure.
These smart solutions are also scalable. Large facilities can adopt full-scale enterprise systems, while smaller ones can start with basic setups like smart locks and Wi-Fi hubs, expanding over time. This phased approach works well, especially for multi-story facilities that need layered security. It’s a flexible way to build a modern, secure storage ecosystem.
3. Multi-Story Space Planning
Multi-story designs, when paired with modular construction, offer up to 300% more capacity compared to single-story layouts. This vertical approach not only solves the issue of limited urban space but also boosts property value significantly.
To make the most of vertical space, architects often incorporate features like mezzanine floors, which create additional storage levels. High-ceiling units, typically measuring between 12 and 16 feet, allow for vertical stacking of items like vehicles or industrial equipment.
When it comes to multi-story construction, structural strength is key. Reinforced floors, capable of supporting 150–200 lbs per square foot, are built to handle heavy items like vehicles. Steel frames with column spacing of 30–40 feet meet fire safety standards while offering flexible layouts for storage units.
"The implementation of modular steel framing has revolutionised multi-story construction, reducing build time by 40% compared to traditional concrete methods while maintaining superior structural integrity", says a senior architect at PSL Limited.
Vertical circulation can be tricky, but modern designs tackle this with creative solutions. Helical ramps are a great example - they provide efficient vehicle access to upper floors while taking up less space than traditional straight ramps.
Climate control is another area where multi-story facilities excel. Independent HVAC systems for each floor maintain consistent temperature and humidity levels throughout the building. This setup minimises energy waste by allowing adjustments based on specific floor needs, which ties into the broader sustainability goals mentioned earlier. These systems also support specialised temperature and humidity controls, a critical feature for certain storage requirements.
Shared infrastructure across floors helps reduce per-unit costs by 15–20%, balancing out the higher initial construction expenses. With increased storage capacity and cost efficiencies, multi-story facilities are an appealing choice for modern self-storage projects.
4. Temperature and Humidity Control
Modern facilities use advanced climate control systems with integrated sensors to monitor temperature and humidity in real time. These sensors send alerts when conditions go beyond preset limits, ensuring preservation efforts stay on track while helping meet energy-saving goals.
Facilities typically keep temperature between 55°F and 85°F and humidity levels between 55% and 65%. Insulated panels with R-values as high as 30 help cut HVAC costs by 25-40% compared to older materials. Key design features include:
- Galvanised steel roofing with standing seams to block moisture
- Concrete floors with moisture-resistant barriers
- Rigid foam insulation and vapor barriers in walls
Smart zoning makes it possible to create tailored environments for different storage needs. For example, wine storage units are kept at 55°F with 50% relative humidity.
"The implementation of our integrated climate control system has revolutionised how we manage environmental conditions. Since installing IoT sensors and automated controls, we've seen a 68% reduction in mold-related incidents while maintaining optimal conditions 24/7", says a senior facility manager at Vantiva.
To ensure these systems run smoothly, maintenance includes:
- Quarterly sensor calibration
- Duct cleaning twice a year
- Adjustments to smart dampers as needed
These systems also tie into energy-saving measures, like energy recovery ventilators, which cut HVAC costs by 30% through heat exchange. They meet industry ventilation standards while keeping energy use in check.
For extreme weather, backup systems include high-capacity dehumidifiers (100 pints/day) and emergency power to maintain stable conditions.
sbb-itb-55d1b84
5. Building Conversion Strategies
Transforming existing buildings into self-storage facilities can be a cost-effective solution, with conversion projects typically costing 30-50% less than constructing new facilities. This approach not only saves money but also reduces construction waste by repurposing existing structures.
Former big-box retail stores are often ideal for these projects due to their 18-24' ceiling heights and open layouts. These features, combined with their sturdy foundations, make them well-suited for storage facility conversions.
Structural Modifications
Key upgrades required for conversions include:
- Reinforcing floors to handle loads of 150 lbs/sq ft or more
- Adding steel framing for unit partitions
- Upgrading HVAC and fire protection systems
Comparing Building Types
Different building types come with their own advantages and challenges when it comes to conversion. Here's a quick breakdown:
| Building Type | Advantages | Challenges |
|---|---|---|
| Retail Stores | High ceilings, open layouts | May require loading dock updates |
| Manufacturing | Strong foundations, wide bays | Ventilation system upgrades needed |
| Office Buildings | Urban locations, multiple floors | Elevator capacity may need assessment |
Integrating Smart Technology
Modernising converted spaces with smart technology is essential. For example, Vantiva's Smart Storage platform enhances security with facial recognition access (98.4% accuracy) and motion-activated 4K cameras, which have been shown to reduce security incidents by 63% compared to traditional systems.
IoT humidity sensors further improve operations by automating climate adjustments, helping to address moisture issues that impact 37% of conversions while also optimising energy use.
6. Energy-Efficient Design
Modern self-storage facilities are turning to energy-efficient designs to cut operational costs and reduce their environmental impact. A standout example is GreenSpace Self-Storage's Phoenix facility, which has achieved 92% energy independence. These energy-saving measures align with the broader focus on operational efficiency, linking seamlessly with the smart access controls and modular construction methods covered earlier.
Smart Energy Management
Vantiva's IoT-enabled energy management platform has proven to reduce energy consumption by 25%. LED motion sensors further cut lighting costs by 35-40%, while solar panels offset 60-70% of energy needs.
Advanced Building Materials
Innovative materials play a key role in energy efficiency. Cool-roof membranes reflect up to 85% of solar radiation, and vapor-sealed concrete slabs help prevent thermal bridging, keeping indoor temperatures stable.
Renewable Energy Integration
Solar power adoption has expanded to include dual-purpose installations, like carport canopies that generate 150-200 kW of energy while offering covered parking. These setups align with mixed-use revenue strategies discussed in Section 7. For instance, Extra Space Storage's 2022 solar initiative across 400 properties reduced grid electricity use by 95%, saving over £10 million annually.
Passive Design Strategies
Features like natural ventilation systems and well-placed windows maximise daylight and minimise heat gain. Paired with automated systems, these designs optimise energy usage throughout the facility.
7. Mixed-Use Integration
Mixed-use integration combines energy-efficient designs with diverse revenue opportunities, making better use of urban spaces. By blending storage, retail, and office areas, these facilities improve functionality while increasing tenant appeal.
Strategic Space Allocation
Using vertical stacking, these buildings make the most of available space while keeping different operations separate:
| Level | Purpose | Space Allocation |
|---|---|---|
| Ground Floor | Retail/Commercial | 30-40% |
| Mid-Level | Office Space | 20-25% |
| Upper Floors | Storage Units | 35-50% |
Operational Integration
Modular layouts allow flexibility in balancing commercial and storage spaces. Adjustments of up to 15% can be made to align with market needs.
Boosting Revenue
These facilities can achieve a 35% higher valuation and increase customer spending through complementary services. This diversified income approach supports the cost-saving goals tied to smart technologies.
Smart Technology Integration
Centralised systems streamline the management of storage, retail, and energy use, reducing costs by 22-28%.
Zoning Considerations
Urban projects often require around 30% commercial space, with parking demands differing by use - retail needs 1 space per 200 sq ft, while storage requires 1 per 1,000 sq ft. Developers typically start zoning approval processes 12-18 months ahead of construction to handle these challenges effectively. These zoning strategies align with the efficient use of space seen in multi-story designs and building conversions.
Design Features Cost Analysis
Analyzing the costs of modular construction and smart technology shows how these features impact financial outcomes:
Hybrid Construction Approaches
Combining modular and conventional construction methods leads to a 22% faster return on investment compared to using just one approach. This approach is particularly effective in urban areas, where speeding up construction can make or break a project’s success.
Multi-Story Economics
- Additional Costs
Building vertically comes with specific expenses:
- Elevator systems (ADA compliant)
- Fire suppression systems
- Seismic reinforcement in high-risk zones
- Revenue Benefits
While vertical facilities have 15-20% higher maintenance costs, they make up for it by offsetting urban land expenses with premium pricing.
Energy Efficiency ROI
Solar panels typically pay for themselves within 5-7 years through energy savings. These savings complement earlier strategies for integrating solar power into energy-efficient designs.
Budget Allocation Framework
Experts suggest the following budget distribution for incorporating key features:
| Feature Category | Budget Allocation | Annual ROI |
|---|---|---|
| Modular Structure | 40-50% | 22-28% |
| Climate Control | 20-25% | 15-20% |
| Vertical Storage | 15-20% | 35-40% |
| Aesthetics | 5-10% | Market-dependent |
This framework emphasises modular systems, precise climate control, and vertical scalability. Conversion projects, in particular, tend to allocate 15% more to smart systems compared to new builds, underscoring their importance in modern upgrades.
Conclusion
From modular construction to mixed-use designs, these seven features are reshaping self-storage facilities to meet modern demands. They focus on creating secure, space-efficient spaces with climate-controlled units.
The financial numbers back this up. With 31% of operators planning to add high-tech amenities, it's clear the industry is moving toward more advanced solutions. These upgrades help cut costs and boost efficiency, offering real financial benefits.
When combined, these features create facilities that make better use of space and increase revenue opportunities. Adding retail options alongside storage units not only boosts facility value but also meets urban customers' needs for secure, easy-to-access units. Technology plays a big role here, improving security, climate control, and automation to keep facilities competitive.
Focusing on modular systems, climate control, and vertical scaling helps keep operations cost-effective while addressing market trends. These updates ensure facilities stay functional and efficient in a fast-changing market.
Related posts
- External Storage Units: Installation Best Practices
- How Smart Design Impacts Storage Facility Profits
- How External Garage Units Maximise Space in your Self Storage Facility
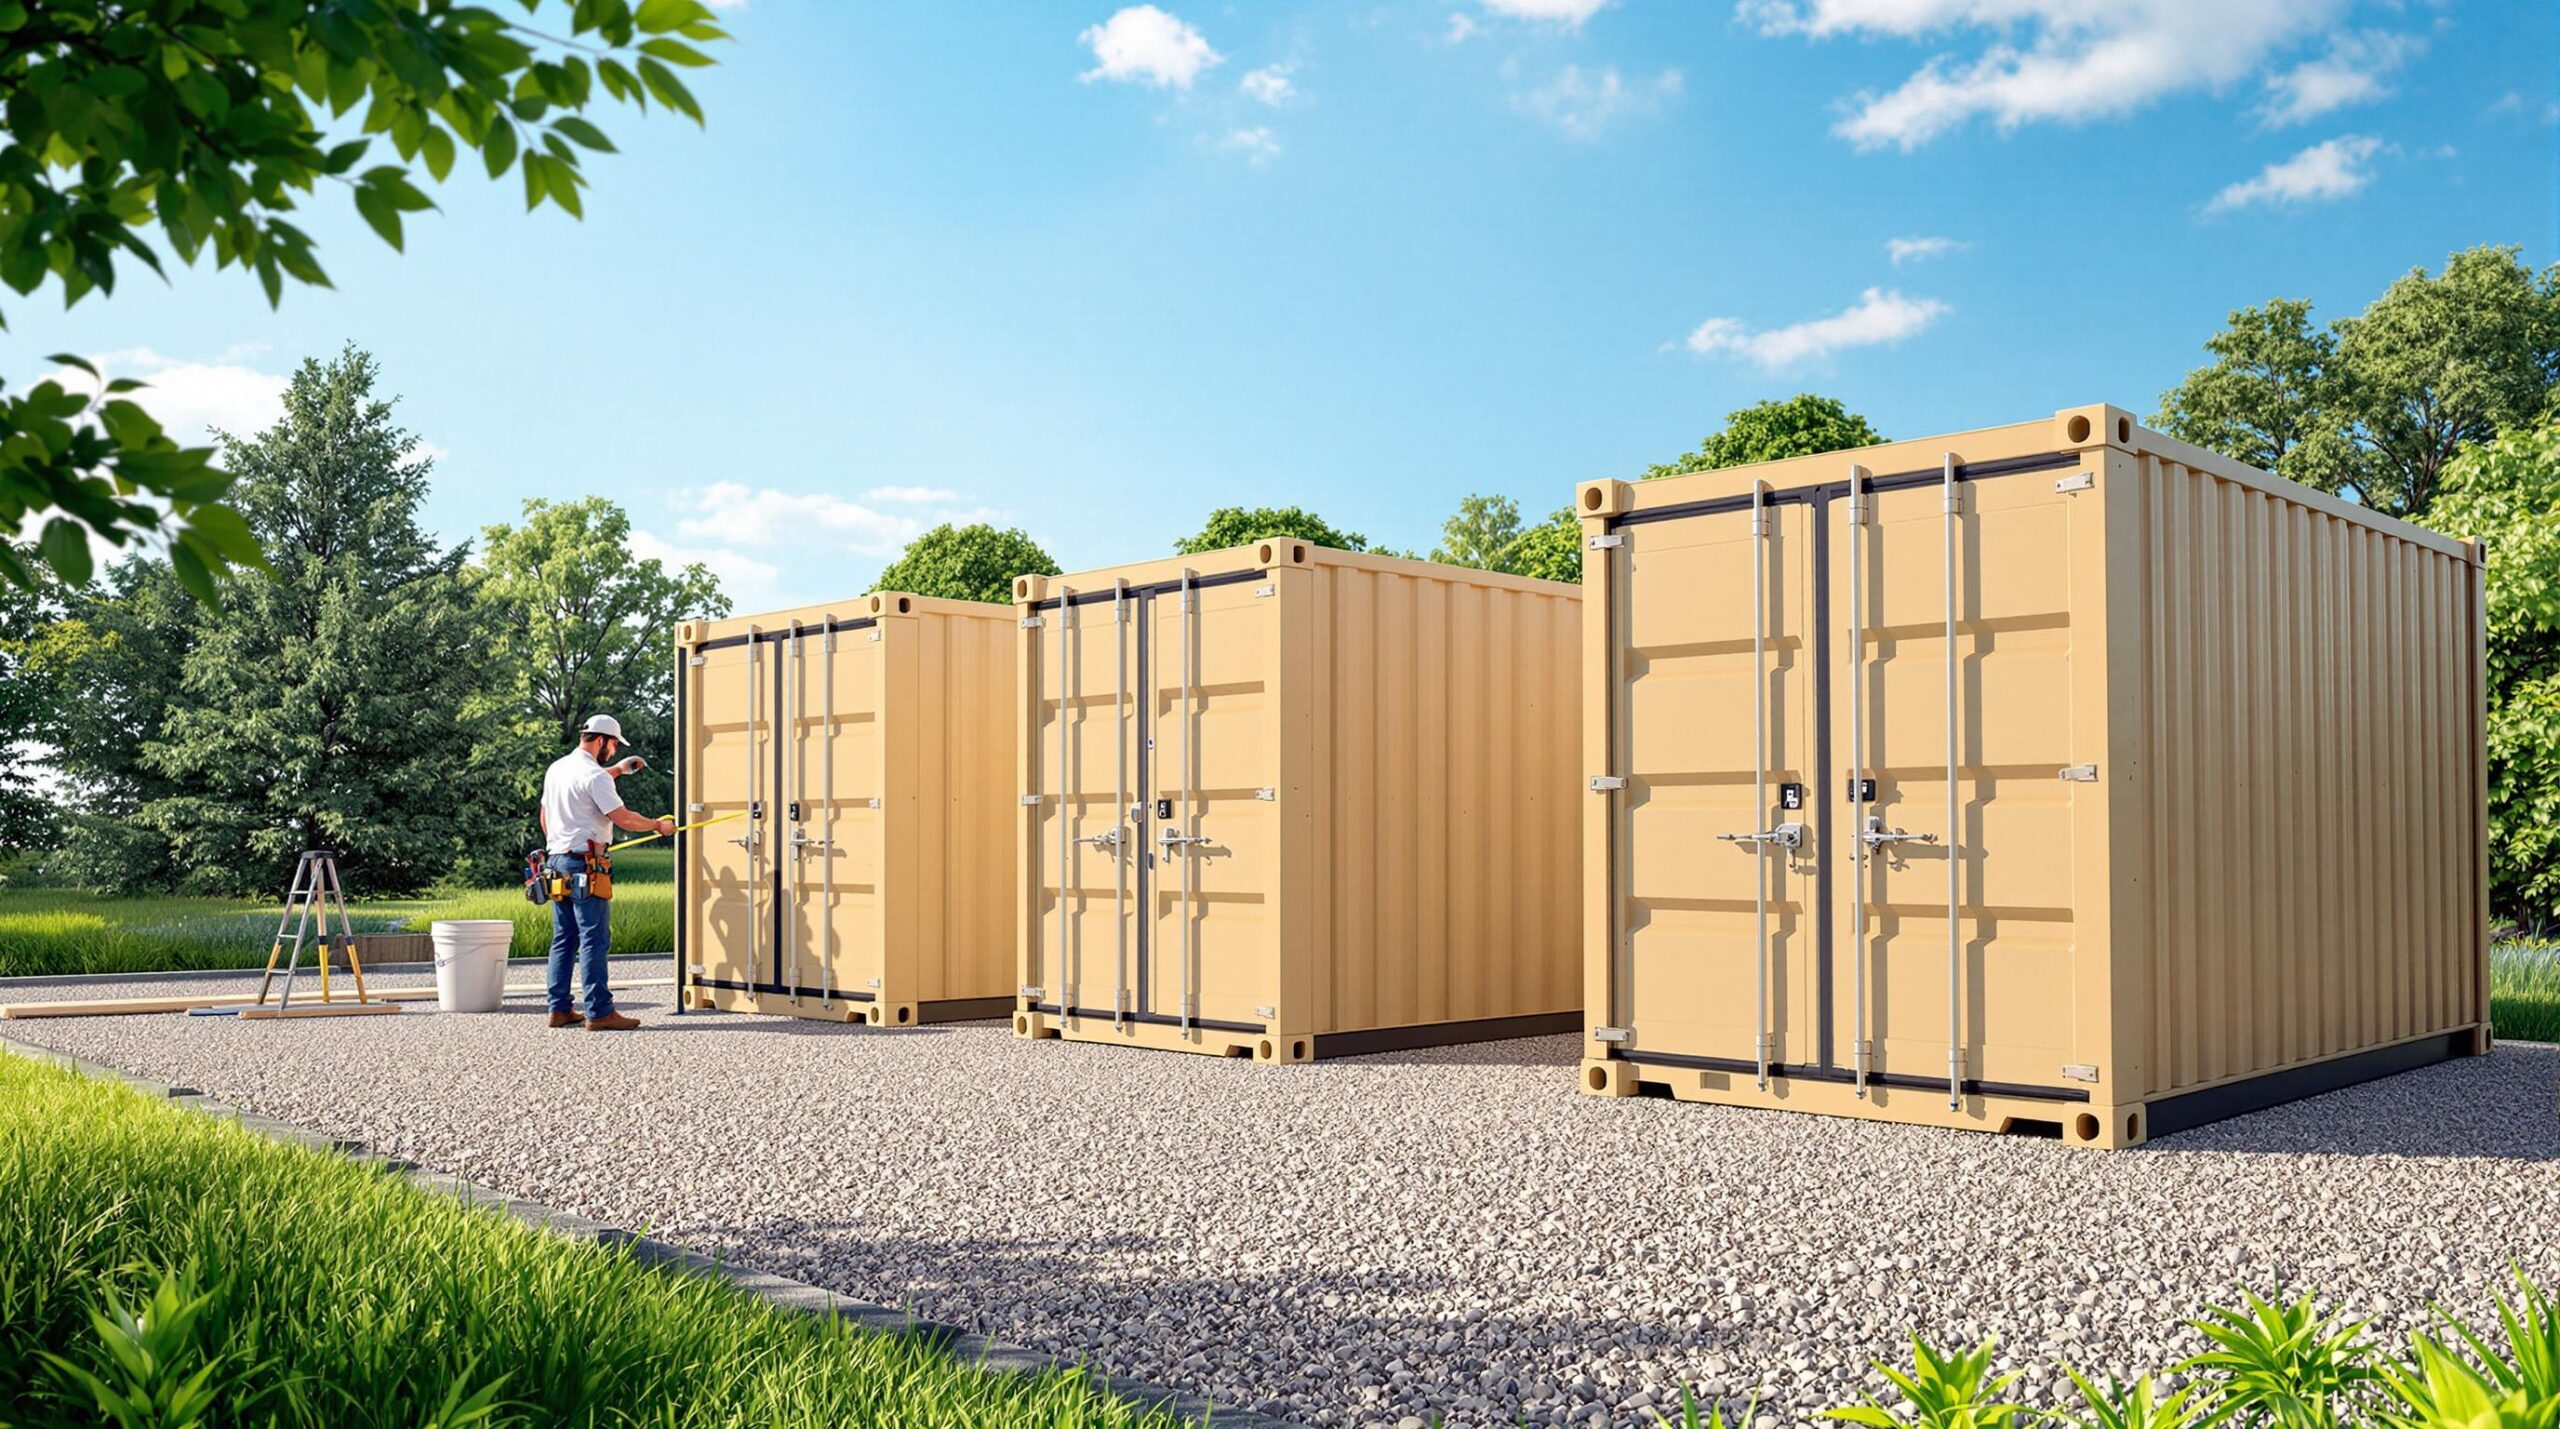
External Storage Units: Installation Best Practices
- Site Preparation: Conduct soil tests, ensure proper drainage (2% slope), and adhere to building codes like fire lane access and foundation depth requirements.
- Material Selection: Use durable materials like galvanised steel or aluminum based on climate. Coastal areas need corrosion-resistant options; cold regions require frost-resistant foundations.
- Weather Adaptation: Install wind anchors for storm-prone areas and elevated foundations in flood zones.
- Efficient Construction: Prefabricated components save time and labor costs, while digital tools like drones and BIM software improve accuracy.
- Security Integration: Planxterne for multi-layered security systems with anti-climb fencing, surveillance cameras, and access control points.
- Quality Control & Maintenance: Use advanced tools for inspections and follow regular maintenance schedules to reduce long-term issues by up to 80%.
Quick Comparison of Materials:
| Material | Features |
|---|---|
| Galvanised Steel | Durable, fire-resistant |
| Aluminum | Lightweight, corrosion-resistant |
| Pressure-Treated Wood | Affordable, easy to modify |
| Fiber-Reinforced Polymer | Weather-resistant, low upkeep |
Proper planning, durable materials, and modern tools ensure a successful storage unit installation while minimising future costs and issues.
Related video from YouTube
1. Site Planning and Preparation
A well-executed site analysis can cut long-term maintenance costs by 15%.
1.1 Site Analysis Methods
Start with soil testing using tools like penetrometers and plate load tests to assess bearing capacity. For clay-rich soils, which can be challenging, deeper foundations or gravel pads are often necessary.
To ensure proper drainage, aim for a 2% slope, verified with laser tools. In areas receiving over 20 inches of annual rainfall, consider installing French drains with gravel-wrapped perforated pipes.
For detailed terrain mapping, GPS surveying equipment combined with LiDAR technology can create 3D models. Tools like SiteScan offer real-time slope analysis, especially useful for areas with inclines greater than 15 degrees. These advanced methods tie into the optimisation tools discussed in Section 3.3.
1.2 Building Codes and Permits
Adhering to building codes is crucial. Here are some key requirements:
| Code | Requirement | Purpose |
|---|---|---|
| Fire Lane Access | Minimum 20ft width | Emergency vehicle access |
| Electrical Conduit | 18" minimum depth | Safety compliance |
| Foundation Depth (Zone 5) | 42" below grade | Frost heave prevention |
| Foundation Depth (Zone 10) | 12" below grade | Adaptation to local climate |
"Proper documentation and permit acquisition typically takes 6-8 weeks, including public hearings for commercial zones", according to FDC's latest storage facility report.
1.3 Weather and Location Factors
Regional climate heavily influences installation requirements. Coastal locations often require galvanised steel materials and foundations raised at least 2 feet above flood map levels, which also helps address corrosion concerns (see Section 2.2).
For slopes steeper than 33%, engineered retaining walls are a must, while areas with wind speeds over 80 mph need cross-bracing systems.
2. Material Selection Guide
2.1 Building Material Types
Choosing the right materials plays a big role in how well your structure performs over time. It affects everything from how easy it is to install (see Section 3.1) to how much maintenance it will need (see Section 5.2).
Here’s a quick comparison of common materials for storage unit construction:
| Material | Lifespan | Features |
|---|---|---|
| Galvanised Steel | 20-30 years | Strong, fire-resistant, secure |
| Aluminum | 25-35 years | Lightweight, resists corrosion |
| Pressure-Treated Wood | 15-20 years | Affordable, easy to modify |
| Fiber-Reinforced Polymer | 30-40 years | Stands up to weather, low upkeep |
2.2 Weather Protection Standards
As discussed in Section 1.3, weather protection is key to keeping your structure functional all year. For coastal areas, marine-grade aluminum (like the 5052-H32 alloy) is a must. It can handle over 1000 hours of salt-spray testing.
Some important protective measures to consider:
- Humid Climates: Use epoxy-polyester coatings and triple-layer galvanisation to cut maintenance needs by 30%.
- Extreme Temperatures:
- Glass-fiber reinforced polymers stay stable from -58°F to +300°F.
- Cross-laminated timber holds its R-12 insulation value at -20°F.
- Aerogel-insulated panels deliver excellent insulation.
For areas where materials meet, sealed expansion joints every 40 feet and Z-flashings with butyl tape at panel overlaps are recommended.
Certifications to look for include ISO 1461 for galvanising and UL 580 for wind resistance. Materials should also meet ASTM E96 water vapor transmission standards, with a rating under 0.1 perm.
3. Step-by-Step Installation Process
3.1 Foundation Work
Building on the soil analysis methods from Section 1.1, preparing the foundation is crucial for ensuring the stability of storage units over time. Start with laser-leveled grading for precision.
Foundation needs depend on the soil type:
- Sandy soils: Require 12-18" footings.
- Clay soils: Benefit from geotextile stabilisation.
- Flood zones: Use elevated piers.
For concrete foundations, reinforced concrete with rebar grids is recommended, with a minimum thickness of 6 inches. For example, FDC Comp's 88,000 sq ft facility uses reinforced concrete combined with drainage channels to prevent moisture damage. This setup highlights durability practices that are essential for long-term performance.
3.2 Construction Methods Comparison
The choice of materials from Section 2.1 directly impacts the construction method. Most modern storage facilities opt for one of two main approaches:
| Method | Time Savings | Cost Impact | Key Benefits | Best For |
|---|---|---|---|---|
| Prefabricated | 50% faster to install | 30% lower labor costs | Consistent quality, less waste | Large-scale projects |
| On-site Building | Standard timeline | Higher labor costs | Flexible custom designs | Complex terrains |
3.3 Digital Tools for Installation
As discussed in Section 1.3, digital tools are transforming installation processes. Building Information Modeling (BIM) software, for instance, has been shown to boost accuracy by 25% and reduce project timelines by 15-20%.
"By implementing IoT-enabled sensors for real-time structural alignment monitoring, we reduced installation errors by 40% and cut our quality control inspection time in half".
Key tools include:
- AutoCAD layouts for precise planning.
- IoT alignment sensors for real-time monitoring.
- Inventory tracking apps to streamline logistics.
- Thermal cameras for detecting structural issues.
These technologies align with the quality control measures outlined in Section 5.
For climate-controlled storage units, advanced sensor systems can track temperature and humidity in real-time. Auto-alerts notify users of threshold breaches, such as humidity exceeding 60%. This ensures optimal storage conditions and reduces the risk of damage.
sbb-itb-55d1b84
4. Security System Integration
4.1 Security Feature Planning
Building on the digital precision techniques outlined in Section 3.3, integrating security systems into a storage facility requires detailed planning from the start. Today, most modern facilities focus on a multi-layered security strategy, with 74% of operators ranking security features as the top priority in facility design.
The foundation of any security system is physical barriers. For perimeter protection, an 8-foot-high fence with anti-climb mesh is the standard requirement.
| Security Component | Coverage and Requirements |
|---|---|
| Surveillance Cameras | Full 360° rotation for parking areas; gates require a 30° downward angle, aligning with drone-assisted height planning from Section 1.1. |
| Access Control Points | Installed at every entry and exit point, designed to meet material durability standards from Section 2.2. |
| Perimeter Fencing | Surrounds the entire facility and includes anti-climb mesh for added protection. |
This multi-layered security setup directly complements the quality control measures covered in Section 5.
4.2 System Integration Steps
When laying the foundation (referencing material placement from Section 2.1), it's essential to follow specific wiring guidelines:
- Use shielded, security-grade cables for runs under 300 feet.
- Maintain a 12-inch separation between power lines and security lines.
- Add endpoint surge protection that complies with the electrical standards discussed in Section 1.2.
Before final handover, rigorous testing is critical. This includes 72-hour entry cycling tests, verifying clear sightlines for all architectural features, and simulating power failure scenarios to ensure system reliability, mirroring the inspection standards from Section 5.1.
5. Quality Control and Upkeep
5.1 Installation Inspection Steps
Quality control kicks off with detailed inspections to ensure both structural integrity and proper placement of security systems, as discussed in Section 4.1. Advanced digital tools, mentioned in Section 3.3, play a key role in these checks.
| Component | Inspection Method | Acceptance Criteria |
|---|---|---|
| Foundation Anchoring | Torque Testing | 85-110 ft-lbs range |
| Wall Panels | Laser-verified alignment | Less than 1/8" variance |
| Door Systems | Automated Cycling | Smooth operation over 72 hours |
| Roof Seams | Water Penetration Test | Zero moisture infiltration |
Digital inspection apps are transforming how inspections are conducted. These apps allow real-time defect tracking, complete with location-tagged visual records, cutting inspection cycles by 40%.
Thermal imaging is used to detect insulation gaps and thermal bridges, while ultrasonic testing ensures weld points meet the required standards. Together, these tools provide a comprehensive evaluation of the unit's durability.
5.2 Regular Maintenance Schedule
Maintenance schedules should account for environmental challenges, as highlighted in Section 2.2. The table below outlines inspection priorities based on climate zones and material performance discussed in Section 2.1.
| Climate Zone/Component | Inspection Focus | Frequency/Action |
|---|---|---|
| Coastal Areas | Salt Spray Corrosion | Monthly |
| Arctic Regions | Heating Systems | Biweekly below -20°C |
| Desert Locations | UV Degradation | Quarterly |
| Door Mechanisms | Lubrication | Quarterly |
| Foundation Anchors | Re-torquing | Annual |
**
6. Conclusion: Installation Best Practices Summary**
Installing external storage units successfully involves careful planning across three main stages: site preparation, material selection, and security integration. Research indicates that thorough preparation can prevent up to 80% of common structural issues. These steps align closely with the site analysis and material selection guidelines outlined earlier in Sections 1 and 2.
Choosing the right materials is a key part of the process. For instance, facilities that use 14-gauge steel walls often achieve over 15 years of service life when properly maintained. Adding weather-resistant coatings, as explained in Section 2.2, further boosts durability.
Modern technology is also reshaping how installations are carried out. Digital tools have improved precision, cutting errors by 22% compared to older methods.
"Our implementation of automated leak-detection systems resulted in 60% fewer weather-related repairs across our facility network, proving that modern technology integration during installation pays significant dividends in maintenance reduction." - FDC Construction Report
Standards for quality have advanced, with load-bearing capacity now set at 400 lbs/sq ft to ensure reliability across a variety of conditions. Incorporating security measures during installation, as discussed in Section 4.1, has also shown clear benefits. Facilities report 40% faster security system deployment and a 35% reduction in retrofit costs.
Location-specific planning is another essential factor. Urban installations often need to address noise mitigation and meet strict setback rules, while rural sites focus on improving stormwater management.
Finally, digital inspection tools, highlighted in Section 5, make it possible to track defects in real time. When combined with proper installation practices, these tools have helped facilities reach 98% occupancy within just 60 days.
FAQs
What is the best material to use for the outside of a shed?
The choice of material depends heavily on your local climate. For instance, galvanised steel is highly durable in extreme temperatures. This makes it a solid option for areas with harsh weather conditions. On the other hand, powder-coated aluminum is better suited for coastal regions, with 30% fewer heat-related issues when using this material.
To ensure durability, materials should meet UL 580 wind certification standards in coastal areas, as mentioned in Section 2.2. For desert climates, heat resistance is a top priority. Additionally, proper installation and adherence to local regulations, as outlined in Section 3.1, are crucial for long-term performance.
Related posts
- 5 Benefits of Locker Storage Units for Your Business
- How Smart Design Impacts Storage Facility Profits
- How External Garage Units Maximise Space in your Self Storage Facility
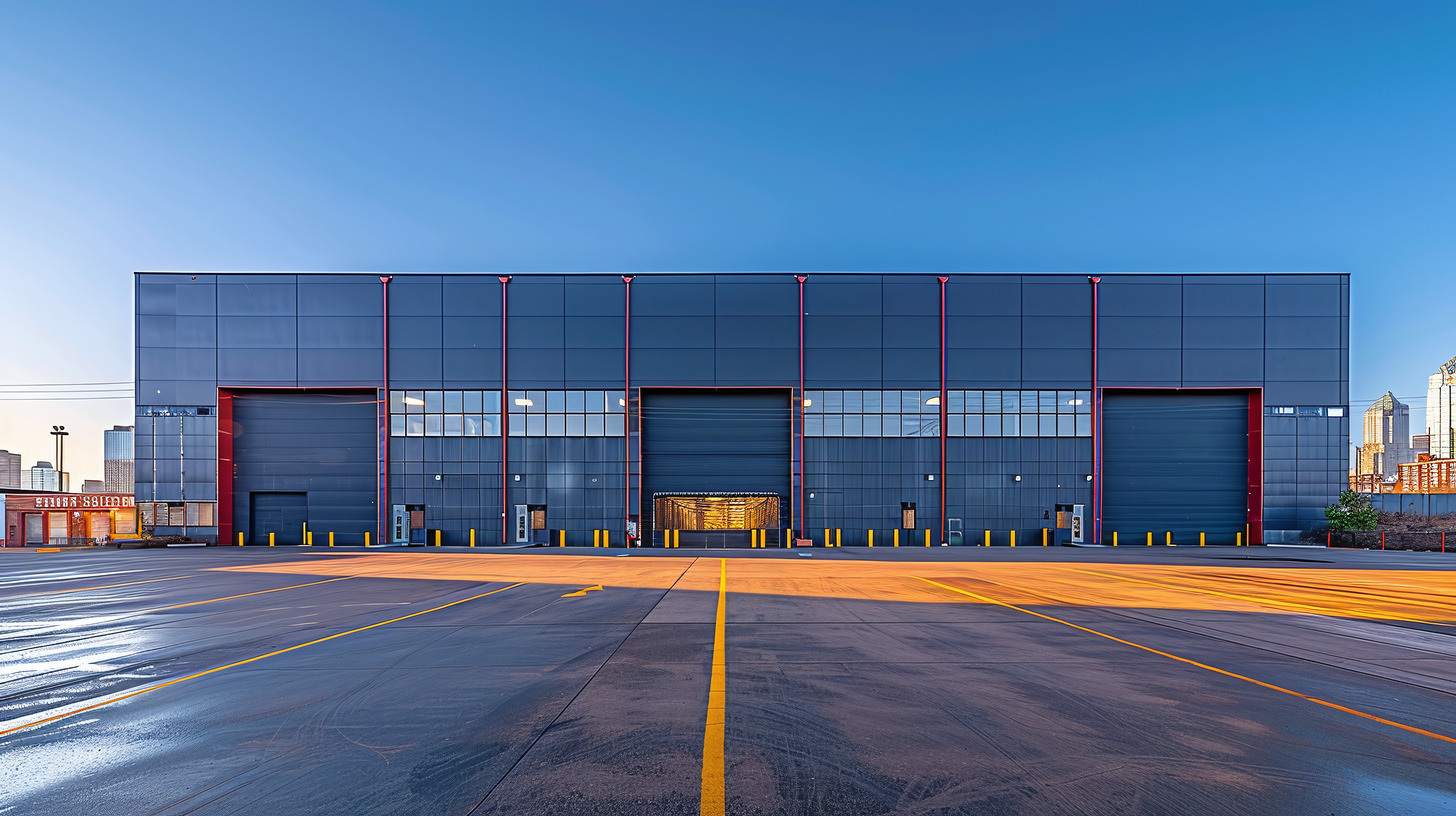
The Expert Guide to Self Storage Centre Construction
When it comes to self storage design, the importance of effective space utilisation and robust construction cannot be overstated. At PSL, we specialise in partitioning solutions that transform vacant spaces into efficient, secure, and profitable self storage centres. Whether you're a property owner looking to diversify your investments or a business aiming to optimise storage options, we offer unparalleled expertise and innovative solutions.
Why Self Storage?
The demand for self storage facilities is on the rise, driven by urbanisation, downsizing, and the growing trend of minimalism. People need space for their belongings, and businesses require secure, off-site storage for their inventory. Investing in self storage centres offers a stable and lucrative revenue stream, but the success of these ventures hinges on the quality and design of the storage units.
Our Expertise
At PSL, we bring years of experience and a deep understanding of the self storage industry. Our team of experts collaborates with you from the initial design phase to the final installation, ensuring every project meets our high standards of quality and efficiency. Here’s how we do it:
- Tailored Designs: We understand that every property is unique, and so are its storage needs. Our design team creates customised partitioning solutions that maximise the available space, ensuring you get the most out of your investment. From small locker-sized units to larger spaces for vehicles or bulky items, we tailor each project to meet specific requirements.
- Quality Materials: Durability and security are paramount in self storage construction. We use top-quality materials that are not only robust and long-lasting but also provide the security your clients demand. Our partitions are designed to withstand wear and tear, ensuring your facility remains in top condition for years to come.
- Advanced Security Features: Security is a major concern for self storage users. We integrate advanced security features into our designs, including reinforced doors, state-of-the-art locking systems, and surveillance options. These features not only protect the stored items but also enhance the overall appeal of your facility.
- Efficient Installation: Time is money, and we respect both. Our installation teams are trained to work efficiently without compromising on quality. We minimise downtime, ensuring your self storage centre is up and running as quickly as possible.
- Sustainability: We are committed to sustainable building practices. Our partitioning systems are designed with energy efficiency in mind, and we use eco-friendly materials wherever possible. This not only reduces the environmental impact but also lowers operating costs in the long run.
Why Choose PSL?
Choosing PSL means opting for excellence and reliability. Our commitment to quality, combined with our innovative approach, makes us the preferred partner for self storage centre construction. We don’t just build storage units; we create spaces that people trust and depend on.
If you're considering entering the self storage market or looking to upgrade your existing facility, contact us today for a consultation. Let’s work together to build a storage solution that meets your needs and exceeds your expectations.


Tips for Long-lasting Partitioning in Self-Storage Units
Investing in high-quality partitioning systems is a smart move for self-storage businesses looking to optimise their space and provide a secure environment for tenants. However, ensuring the long-term functionality and visual appeal of these partitions requires a commitment to regular maintenance. In this article, we’ll explore essential tips for maintaining and caring for your partitioning systems, ultimately extending their lifespan and enhancing the overall quality of your self-storage facility.
1. Schedule Regular Inspections: Regular inspections are the foundation of an effective maintenance strategy. Create a schedule for routine inspections of your partitioning systems to identify any signs of wear, damage, or malfunctions. This proactive approach allows you to address issues before they escalate, minimising downtime and potential disruptions for your tenants.
2. Address Wear and Tear Promptly: Partitioning systems, like any infrastructure, are subject to wear and tear over time. Promptly address any signs of deterioration, such as rust, scratches, or loose components. Replace damaged parts, repaint surfaces, and tighten loose connections to keep your partitions in optimal condition.
3. Cleanliness is Key: Maintain a clean and well-kept environment within your self-storage facility, including the partitioned areas. Dust and debris can accumulate on partition surfaces, affecting both the aesthetics and functionality. Regular cleaning not only improves the appearance but also prevents issues such as jammed sliding mechanisms or malfunctioning locking systems.
4. Lubricate Moving Parts: If your partitioning systems include moving parts, such as sliding doors or adjustable panels, regular lubrication is essential. Apply suitable lubricants to hinges, tracks, and any other components requiring smooth movement. This simple step can prevent friction-related damage and ensure that moving parts function effortlessly.
5. Keep Track of Environmental Factors: Consider the environmental conditions within your self-storage facility. Humidity, temperature fluctuations, and exposure to the elements can impact partitioning materials over time. Choose materials that are resilient to these conditions and implement measures to control the indoor climate as needed.
6. Train Staff on Maintenance Protocols: Ensure that your staff is well-trained on proper maintenance protocols for the partitioning systems. Provide guidelines for regular checks, cleaning procedures, and basic troubleshooting. Empowering your team to identify and address issues promptly contributes to the overall effectiveness of your maintenance strategy.
7. Implement a Preventive Maintenance Program: Go beyond reactive maintenance by implementing a preventive maintenance program. This may include scheduled inspections, routine cleaning, and proactive replacements of components that are prone to wear. A well-structured preventive maintenance program minimises the risk of unexpected issues and enhances the overall reliability of your partitioning systems.
8. Invest in Durable Materials: When initially selecting partitioning systems, prioritise durable and high-quality materials. Investing in partitions made from materials resistant to corrosion, impact, and other environmental factors contributes significantly to their longevity. Quality materials may require a higher upfront cost but pay off in terms of reduced maintenance expenses over time.
Conclusion: Maintenance is a critical aspect of managing a successful self-storage facility, and partitioning systems are no exception. By incorporating these maintenance tips into your facility management routine, you can ensure that your partitioning systems remain in top condition, providing a secure and visually appealing environment for your tenants. Remember, a well-maintained facility not only promotes tenant satisfaction but also reflects positively on your self-storage business in the competitive market.

Partitioning Strategies for Self-Storage Startups
When it comes to running a successful self-storage business, maximising the available space within your facility is key to attracting more tenants and increasing your revenue. Smart partitioning techniques can transform your self-storage layout, allowing you to accommodate a larger number of tenants while maintaining a functional and organised environment. In this article, we’ll explore effective partitioning strategies that are tailored to self-storage startups, helping you make the most of your space and provide exceptional service to your clients.
Understand Tenant Needs and Trends:
Before diving into partitioning, it’s crucial to understand the storage needs of your potential clients. Research current trends in the self-storage industry and gather data on the types of items people typically store. This insight will guide your partitioning decisions, ensuring that you create units that cater to your target audience.
Flexible and Adjustable Partitions:
Consider using partitions that can be easily adjusted or expanded as needed. This flexibility allows you to adapt to varying storage requirements, accommodating both small and large items. Adjustable partitions can be particularly useful for tenants who may need to upgrade or downsize their storage space over time.
Multi-Level Storage Layouts:
For startups with limited square footage, multi-level storage layouts can significantly increase your storage capacity. Utilise vertical space by installing mezzanines or platforms that provide additional levels of storage. This strategy can help you optimise the use of space without compromising on convenience for your tenants.
Modular Units for Customisation:
Offering modular storage units allows tenants to create their own customised storage areas. These units can be partitioned in various ways using shelves, dividers, and racks. This level of customisation caters to different types of items and enables tenants to efficiently organise their belongings.
Utilise Corridors and Aisles:
Efficiently designed corridors and aisles can make a significant difference in your facility’s layout. Optimise these pathways by using partitioning walls that are strategically placed to create clear, accessible pathways. This not only enhances the overall flow of the facility but also makes it easier for tenants to move their items in and out.
Security and Privacy:
Partitioning isn’t just about maximising space; it’s also about providing security and privacy for your tenants. Utilise partitions to create individualised storage spaces that deter theft and minimise unauthorised access. Clear divisions between units help ensure that each tenant’s belongings remain secure and protected.
Regular Maintenance and Upkeep:
Effective partitioning solutions require regular maintenance to remain functional and visually appealing. Inspect partitions for signs of wear and tear, and promptly address any issues. A well-maintained facility not only provides a positive experience for tenants but also extends the life of your partitioning systems.
Conclusion:
As a self-storage startup, implementing intelligent partitioning strategies is essential for optimising your facility’s space efficiency. By understanding tenant needs, utilising flexible partitions, considering multi-level layouts, and prioritising security, you can create a self-storage environment that not only maximises your revenue potential but also provides a seamless and satisfying experience for your clients. With the right partitioning approach, your self-storage startup can set the foundation for long-term success in the industry.

Complete Design Service
We have over 20 years experience with designing self storage facilities and have built and designed over 100's of them. The entire unit layouts are designed with AutoCAD and converted to PDF files all for your approval, which allows us to be able to plan and design your centre based on your specifications, in the most cost-effective and efficient way possible.
Our designs enable us to construct the storage centre using the different systems we have in place. We aim to match all of your unique requirements such as a specific unit mix whilst keeping strictly within all building regulations. Not only that, we can offer guidance and expertise on the best design for your facility that will increasing your income revenue.